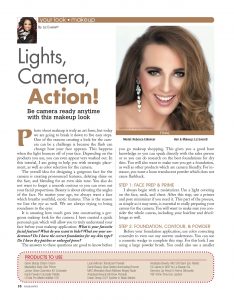
Be camera ready anytime with this makeup look
Photo shoot makeup is truly an art form, but today we are going to break it down to five easy steps. One of the reasons creating a look for the camera can be a challenge is because the flash can change how your face appears. This happens when the light bounces off of your face. Depending on the products you use, you can even appear very washed out. In this tutorial, I am going to help you with strategic placement, as well as color selection for the camera.
The overall idea for designing a gorgeous face for the camera is creating pronounced features, deleting shine on the face, and blending for an even skin tone. You also do not want to forget a smooth contour so you can even out your facial proportions. Beauty is about elevating the angles of the face. No matter your age, we always want a face which breaths youthful, exotic features. This is the reason we line the eye as well. We are always trying to bring roundness to the eyes.
It is amazing how much goes into constructing a gorgeous makeup look for the camera. I have curated a quick personal quiz which will allow you to truly understand your face before your makeup application: What is your favorite facial feature? What do you want to hide? What are your undertones? Do I have the correct foundation for my skin type? Do I have dry patches or enlarged pores?
The answers to these questions are good to know before you go makeup shopping. This gives you a good base knowledge so you can speak directly with the sales person or so you can do research on the best foundations for dry skin. You will also want to make sure you get a foundation, as well as other products which are camera friendly. For instance, you want a loose translucent powder which does not cause flashback.
Step 1: Face Prep & Prime
I always begin with a moisturizer. Use a light covering on the face, neck, and chest. After this step, use a primer and pore minimizer if you need it. This part of the process, as simple as it may seem, is essential to really preparing your canvas for the camera. You will want to make sure you consider the whole canvas, including your hairline and décolletage as well.
Step 2: Foundation, Contour, & Powder
Before your foundation application, use color correcting concealer to even out any uneven undertones. You can use a cosmetic wedge to complete this step. For this look I am using a large powder brush. You could also use a smaller brush or a beauty blender, but I want a buffed out look so I’m using a circular stipple stroke for the total application, also applying the foundation over the entire canvas area.
I use concealer under the eye to brighten. For overall contour, I am using powder contour palette. Since Rebecca’s skin is a little dryer, I used a stipple stroke to apply and build the coverage. I use a powder puff folded to create my lines on the cheek, chin and forehead. I then go to a smaller detailing brush for the nose.
As you blend the contoured areas, triple check that every area is unified in color. You can then apply some loose translucent powder underneath the eye with a cosmetic wedge to help lift the eye’s appearance. Once complete, begin applying your face powder. Make sure you apply it to the entire canvas area. You want the same texture from the forehead/hairline to décolletage.
To read the rest of the Makeup feature… Click Here
To subscribe to Pageantry magazine… Click Here
To follow Pageantry magazine on Instagram… Click Here
To follow Pageantry magazine on FaceBook… Click Here