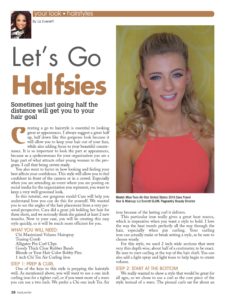
Sometimes just going half the distance will get you to your hair goal
Creating a go to hairstyle is essential to looking great at appearances. I always suggest a great half up, half down like this gorgeous look because it will allow you to keep your hair out of your face, while also adding focus to your beautiful countenance. It is so important to look the part at appearances, because as a spokeswoman for your organization you are a huge part of what attracts other young women to the program. I call that being crown ready.
You also want to factor in how looking and feeling your best affects your confidence. This style will allow you to feel confident in front of the camera or in a crowd. Especially when you are attending an event where you are posting on social media for the organization you represent, you want to keep a very well-groomed look.
In this tutorial, our gorgeous model Cara will help you understand how you can do this for yourself. We wanted you to see the angles of the hair placement from a very personal perspective. Cara did a great job holding her hair for these shots, and we seriously think she gained at least 2 new muscles. Now in your case, you will be creating this easy style quickly, so it will be much more efficient for you.
What You Will Need:
Chi Maximized Volume Hairspray
Teasing Comb
Alligator Pin Curl Clips
Goody Thick Clear Rubber Bands
Blonde or Your Hair Color Bobby Pins
1 inch Chi Tex Air Curling Iron
Step 1: Prep & Curl
One of the keys to this style is prepping the hairstyle well. As mentioned above, you will want to use a one inch curling iron for a tighter curl, or if you want more of a wave you can use a two inch. We prefer a Chi one inch Tex Air iron because of the lasting curl it delivers.
This particular iron really gives a great heat source, which is imperative when you want a style to hold. I love the way the heat travels perfectly all the way through the hair, especially when pin curling. Your curling iron can actually make or break setting a style, so be sure to choose wisely.
For this style, we used 2 inch wide sections that were very thin depth wise, about half of a centimeter, to be exact. Be sure to start curling at the top of the hair shaft. You can also add a light spray and light tease to help begin to create volume.
Step 2: Start at the Bottom
We really wanted to show a style that would be great for all ages, so we chose to use a curl as the core piece of the style instead of a wave. The pinned curls sat for about an hour and a half before we started shooting the tutorial.
Starting at the nape of the neck, begin letting the pin curls down one at a time. Use a slight twisting motion, and you can also spray it lightly with Chi Maximized Volume hairspray. If you want a curlier look, you can separate the curls, as well.
Be patient as you pull them down. You want to make sure you are setting the base for a great style that will last. If you want to soften the curls, you can also comb through gently with a boar’s hair brush. That always helps create a gently curled tendril.
To read the rest of the Hairstyles feature… Click Here
To subscribe to Pageantry magazine… Click Here
To follow Pageantry magazine on Instagram… Click Here
To follow Pageantry magazine on FaceBook… Click Here