Use this styling wand for a versatile array of looks
From beach waves to soft tousled tendrils, I love the range of hairstyles I can create from my Bed Head Curlipops wand. In this tutorial, I wanted to share a classic hairstyle that looks gorgeous for a pageant interview, as well as a fashion photo shoot. This style is super easy to achieve and puts all the focus on the model’s beautiful face.
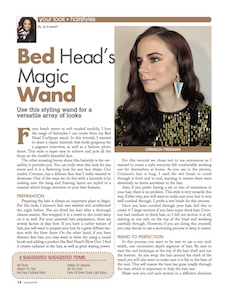
The other amazing bonus about this hairstyle is the versatility it provides you. You can truly wear this look for any event and it is a flattering look for any face shape. Our model, Crimson, has a delicate face that I really wanted to showcase. One of the ways we do this with a hairstyle is by making sure the bang and framing layers are styled in a manner which brings attention to your best features.
Preparation
Preparing the hair is always an important place to begin. For this look, Crimson’s hair was washed and conditioned the night before. She air-dried her hair after a thorough cleanse session. She wrapped it in a towel so she could sleep on it as well. For your personal hair preparation, there are several factors at play here. If you have a curlier texture of hair, you will want to prepare your hair by a great diffuser session with the blow dryer. On the other hand, if you have thinner, fine hair, you may want to blow dry using a round brush and adding a product like Bed Head’s Blow Out. I find it creates radiance in the hair, as well as great staying power.
For this tutorial we chose not to use extensions as I wanted to create a style everyone felt comfortable working out for themselves at home. As you see in the photos, Crimson’s hair is long. I used the wet brush to comb through it from end to end, wanting to ensure there were absolutely no knots anywhere in the hair.
Also, if you prefer having a set or two of extensions in your hair, there is no problem. This style is very versatile this way. Either way, you will want to make sure your hair is very well combed through. I prefer a wet brush for this process.
Once you have combed through your hair, feel free to create 4-7 large sections if you have super thick hair. Crimson had medium to thick hair, so I did not section it at all, starting at one side on the top of the head and working carefully through. However, if you are doing this yourself, you may decide to use a sectioning process to keep it neater.
Wand to Perfection
In this process, you want to be sure to use a one inch width, one centimeter depth segment of hair. Be sure to start the curl technique at the top of the hair shaft and not the bottom. As you wrap the hair around the shaft of the wand you will also want to make sure it is flat to the base of the tool. This will ensure the heat has gone totally through the hair, which is important to help the hair last.
Make sure you curl each section in a different direction as seen in the photo of Crimson’s hair. I also recommend spraying each section with a medium hold hairspray. For this tutorial, I chose Redken 25 which has a great long-lasting hold. I am always sure to spray each segment of hair as I work through it.
To ensure the styling process totally sets you up for success, be sure you grab each segment of hair and triple check the hair is coiled throughout your head. This will allow the waves to literally pop out once you begin to style.
To read the rest of the Hairstyles feature… Click Here
To subscribe to Pageantry magazine… Click Here
To follow Pageantry magazine on Instagram… Click Here
To follow Pageantry magazine on FaceBook… Click Here