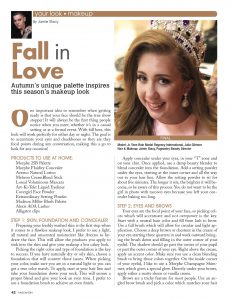
Autumn’s unique palette inspires this season’s makeup look
One important idea to remember when getting ready is that your face should be the true show stopper! It will always be the first thing people notice when you meet, whether it’s in a casual setting or at a formal event. With fall here, this look will work perfectly for either day or night. The goal is to accentuate your eyes and cheekbones so they are they focal points during any conversation, making this a go to look for any occasion!
Products to Use at Home:
Morphe 25B Palette
Morphe Fluidity Concealer
Aveeno Natural Lotion
Mehron CreamBlend Stick
Loreal Voluminous Mascara
Art-Ki-Tekt Liquid Eyeliner
Covergirl Face Powder
Extraordinary Setting Powder
Madison Miller Blush Palette
Alexis AOA Lashes
Alligator clips
Step 1: Skin, Foundation and Concealer
Preparing your freshly washed skin is the first step when it comes to a flawless makeup look. I prefer to use a light, all natural and unscented moisturizer like Aveeno to hydrate the face. This will allow the products you apply to sink into the skin and give your makeup a less cakey look.
Picking the right color and type of foundation is the key to success. If you have naturally dry or oily skin, choose a foundation that will counter those issues. When picking your color, make sure you are in a natural light so you can get a true color match. To apply, start at your hair line and take your foundation down your neck. This will ensure a proper blend and give your look an even tone. I prefer to use a foundation brush to achieve an even finish.
Apply concealer under your eyes, in your “T” zone and on your chin. Once applied, use a damp beauty blender to blend concealer into the foundation. Add a setting powder under the eyes, starting at the inner corner and all the way out to your hair line. Allow the setting powder to sit for about five minutes. The longer it sits, the brighter it will become, so be aware of this process. You do not want to be the girl in photo with raccoon eyes because you left your concealer baking too long.
Step 2: Eyes and Brows
Your eyes are the focal point of your face, so picking colors which will accentuate and not overpower is the key. Start with a neutral base color and fill from lash to brow. Use a full brush which will allow for circular and light application. Choose a deep brown or chestnut in the crease of your eye starting three quarters in and work outward bringing the brush down and filling in the outer corner of your eyelid. The shadow should go past the center of your pupil or past the outer corner of your eye. Right above the crease, apply an accent color. Make sure you use a clean blending brush to bring those colors together. On the inside corner of your eyelid, I like to use a Morphe Champagne Shimmer, which gives a special glow. Directly under your brows, apply either a matte sheen or vanilla creme.
Brows are a tricky feature for most people. Use an angled brow brush and pick a color which matches your hair color. Start with the bottom of the brow near your nose and draw a line to the outer edge of the brow. For the top, start in from the brow, then extend to the outer edge of the brow. Start making upward, flicking stroke motions with your brush to fill in your brown. Use one shade lighter on the inside of your brow near your nose to make sure you don’t have that boxed eyebrow look. Use a brow brush to smooth any edges.
When I am going for a dramatic look, I always use liquid black eyeliner. Make sure you use a felt point tip liquid liner as it gives you the capability of angling exactly where you want your liner. I always start 1/8” on the outside corner of the eye and bring it into the inner corner of the eye.
Step 3: Eyelashes
I love, love, love lashes! Curl your natural lashes and apply mascara first. My preference on any look is the Alexis lash. It provides a full natural look. Apply glue to the lash, allow it to dry for about a minute then apply the middle section first. You can then stick the inner and outer corners down with ease.
To read the rest of the Makeup feature… Click Here
To subscribe to Pageantry magazine… Click Here
To follow Pageantry magazine on Instagram… Click Here
To follow Pageantry magazine on FaceBook… Click Here